
A completed tub of silicone climbing hold molds
Now to create a silicone mold out of your foam hold.
Note: Some terminology I may use:
-your foam mold is considered a "positive" which will be used to make a "negative"
-a "flange" refers to the excess silicone that comes around the base of the mold
You will need to secure your foam mold onto some foam board. This foam board can be found at any craft store or super center for about 3 bucks a sheet. Cut a section of foam board that is at least 1/2" larger on all sides than your foam mold. This will leave enough room for a suitable flange.
To secure the foam hold to the foam board, you can use a few different methods. One way is by punching toothpicks through both the foam board and foam hold. Or, you could use glue to secure the hold. We have found that a combination of toothpicks and glue gives a solid bond that won't come apart as you are applying silicone.


The stickers were an attempt to create a raised spot with no texture on the finished hold
It worked. Now we need to find dinosaur stickers!
After you have secured the foam holds to the foam board, you are ready to begin mixing your silicone.

Remember in part 1 where we said to wear a respirator and gloves? Yeah still do that...
See more after the jump...
Also, Use 100% Silicone. You can find this at any hardware store. It will likely be near the paint supplies with all of the other caulking. You may have to read carefully to see if the caulking is in fact 100% silicone. We found a pack of 4 tubes for 15 dollars. Search around online and you should be able to do better. You can also find the Naphtha wherever you can find the silicone. This is used to dilute the silicone and give it a thinner consistency so you can paint on the silicone easily. It will also make the silicone dry quicker. (don't worry you'll have probably 30 or more minutes to work with. A quart of Naphtha will go for 10 bucks.
There is no real magical proportions of Naphtha and silicone. More Naphtha = thinner. Less = thicker. We have found that somewhere around a 50/50 (by volume) mixture is a good starting point. In general I would say a thinner mixture is good for the first coat so that you for sure get in all of the texture. As the layers go on, you can let the mixture get thicker.

Also, we have found that adding the silicone to the Naphtha is easier than adding naphtha to silicone.

Stir the mixture with any sort of craft stick, paint stirrer, etc. until you get a consistent and paint-able consistency. We mix in disposable cups and an old plastic container. The silicone will peel off once dry, so if you want to reuse a cup you can.
Now you're ready to paint it on. We have used disposable paint brushes that you can find 2 for a dollar. Cheap foam brushes don't work so well, so you might have to spend that extra dime on some real paint brushes. We have not successfully been able to reuse a brush. Don't try to store it in the naphtha or an airtight bag or anything- just get yourself a new brush.
As for the tube of silicone. If you are not using a full tube for each layer, you don't have to do anything fancy to save it for the next layer. The end of the tube will dry up like the silicone on our molds. However, if you just peal off or cut off the tip, the remainder of your tube will be just fine.


Make sure to get down in all of the cracks and holes. You want to avoid creating any bubbles in your silicone mold to keep the mold strong and accurate to your hold.

You're done!... with the first coat. Let it dry until it is no longer wet to the touch. This could take as little as 2 hours. We typically let it dry overnight just to be safe. As it is drying, you don't really need to worry about the fumes... I wouldn't leave it on your kitchen counter, or sleep with it. But you could leave it in a garage with no fume problems.
Now do that again... and again... and again... until you have a thick (about 1/8') mold.


Paint...

Dry...
For our third (and forth) layer, you can now add layers of cheesecloth. Cheesecloth can be found at any grocery store. You could also use gauze if you'd like. Cheesecloth is cheaper at only about 5 bucks for the package you see below.
The point of cheesecloth is to add strength to the mold. Since silicone is so elastic, a mold without silicone will stretch and deform easily during the casting process. The cheesecloth will still allow you to turn the mold inside out and stretch it to some extent without threat of tearing.

Cut your cheesecloth into small strips or squares. You want an even layer that overlaps itself. Don't go too thick with the cheesecloth. We went one layer at a time.

Get the cheesecloth down on to the flange too. This keeps it strong and prevents it from tearing through the mold as well.

After you have placed the layer of cheesecloth on the mold, mix the silicone and Naphtha and paint over the cheesecloth.

Mix...

Paint...

Dry...

Mix...

Add another layer of cheesecloth...

Paint...

Dry...
For the last layer, we want to just add a layer of silicone with no cheesecloth. This makes sure all of your cheesecloth is well covered and adds a bit more width to the mold.
At this point we ran out of silicone and had to get a different kind. Still 100% silicone. But clear now. Just wanted you to know there is nothing different about this next (and last!) layer.


Mix...

Here we caulked directly onto our mold a bead of silicone for rigidity. Don't ever let the silicone layers (or bead) get too thick because it can dry on the outside and seal in the wet silicone which won't dry.

Dry...
For those of you playing along at home, that was a total of 5 layers. 2 initial layers of silicone/naphtha. 2 layers of cheesecloth and silicone/naphtha. 1 final layer of silicone/naphtha. You are more than welcome to continue to add layers. More = stronger/ less flexible/ more money.

Now that we have our thick silicone negative, We need to remove the foam positive from inside.
You can cut around the outside of the foam board to give you a finished shape of your mold with a flange. Remember to leave about 1/4" of flange.
You won't be able to save the foam hold, so don't worry about cracking and compressing the foam when removing it from the mold.
Start by pulling off the foam board.


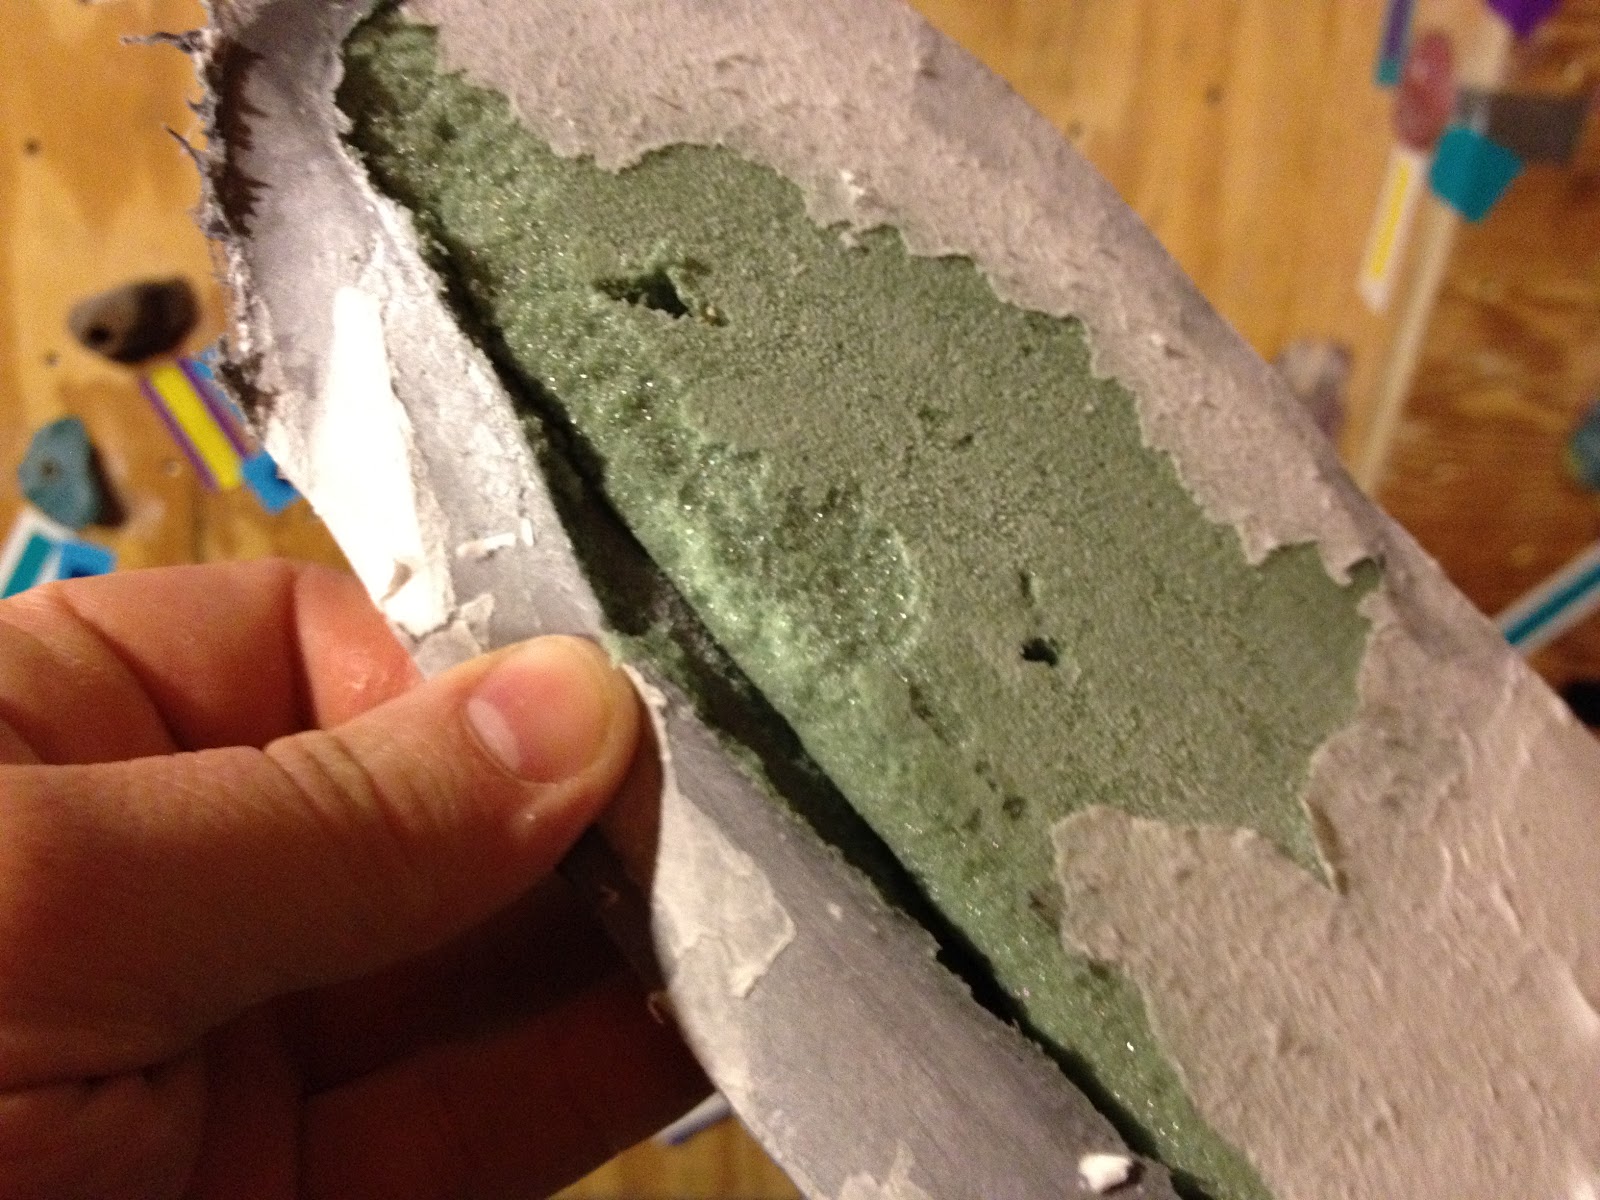
Peal back the silicone from the foam.

Get all of the foam out of the mold. Crack it, rub it, scrape it, used compressed air, water- whatever it takes to get all of the foam out.

You can turn the mold inside out to help you get all of the foam off.

A cleaned out mold
(still needs some water or compressed air to get out the remainder of dust).


The mess from cleaning out the foam will be similar to the mess you made creating the foam hold. So similar clean up techniques will be required soon.

Now you have a lovely silicone mold! Congrats. I'm sure it looks great. You should be able to cast half a dozen or so holds out of this mold with no issue. Eventually it may tear, or more likely you will get tired of having so many of the same holds on your wall. Either way, the cost and time you put into this mold should yield plenty of great holds.
Jump back to Part 1 if you want to review making the foam hold again.
no naphtha in canada, any substitutes?
ReplyDeleteactually we have this coleman naphtha fuel, would that work?
ReplyDeleteHave you tried the Coleman camp fuel?
DeleteHave you tried the Coleman camp fuel?
Deleterock climbing holds
ReplyDeleteThe best option for climbers to repair their shoes is resoling of the shoes. You can easily find the people in your local gym, who are using resoled pair of shoes. These are not the person who is using these shoes only in regular wear, but they also take for the climbing purpose. With two to three time resoled shoes, they reach their destination without any trouble. Some shoes are difficult to repair because they are overused. The shoes with fix holes in the upper layer of leather are not easily fixable. The worn out shoes that are easily fixable are the replacement of rubber sole.
The best option for climbers to repair their shoes is resoling of the shoes. You can easily find the people in your local gym, who are using resoled pair of shoes. These are not the person who is using these shoes only in regular wear, but they also take for the climbing purpose. With two to three time resoled shoes, they reach their destination without any trouble. Some shoes are difficult to repair because they are overused. The shoes with fix holes in the upper layer of leather are not easily fixable. The worn out shoes that are easily fixable are the replacement of rubber sole.