Tuesday, February 28, 2012

How to - Create an iPhone Tripod Mount


Earlier I promised some amateur photography DIY posts, and here ya go. Since I got my iPhone, I wanted to put that sexy camera to use. To do that, I really needed to stabilize the camera on a tripod. This would allow me to get steadier shots, time-lapse videos, etc. It won't get me any where close to Simon Carter's level of photography work, but it's a cheap start.

I found a few commercial mounts like the glif or this universal mount. However, I wasn't satisfied with those options. I didn't like that the glif required a "naked" iPhone, and the universal mount was made of flimsy plastic (which some reviewers say breaks very easily).

So, I decided to create my own tripod mount with some materials I found around my house and a quick trip to Home Depot. I went through a few designs before landing on the one shown in the video above. The most expensive piece was the 1/4" connecting cap nuts at almost 5 dollars for a 4 pack. If you wanted to substitute it for a bolt and some nuts, I think that could work as well, but would require some more work to get it attached as well as the connecting cap nut. I won't do a written DIY on this one because the video should be simple enough to follow. If you have any questions, just ask in the comments below.

Check out this time-lapse video I did using this mount and my UltraPod II tripod and some magnetic wide-angle iPhone lenses. The video shows Cameron and Phil cutting out an ampersand to be used for engagement photos.

More Videos and DIY to come. Check out our YouTube channel for more content.

-Jonathan

Thursday, February 23, 2012

How to - $5 Rock Climbing Holds!

Have you ever wanted your own bouldering gym? Ever look into buying all of the holds!? Yeah, that can get pricey. We have completed our 3 part series on making your own inexpensive rock climbing holds. They look and feel like the professional ones at a fraction of the cost. We estimate that each hold uses $5 or less in material cost to make! That's awesome. Plus you get to make your own creations. Whatever design, size, or color, you can think of- it's yours. Check out our hold page to see our creations using this technique.

After searching the internet for how-to's and tips on making our own holds, we were left with bits and pieces of the process. We were determined to figure it out anyways. After trial and error, we learned the process and are  now successfully climbing on our own holds. We have decided to share our knowledge in one centralized location. With any luck, you can recreate our process and can soon be climbing on your own holds. Don't let the process scare you, it's really not very difficult.

We hope you enjoy and have great success with creating your own holds. If you do make some, please share with us pictures and stories of your adventure. If you have any tips or tricks from making your own holds, share those too. We're no experts and would love to learn anything that makes the process cheaper, easier, or generally better.

Start with Part 1 where you make a foam hold
Then create your silicone mold in Part 2
Finish by casting a resin hold in Part 3
(or you could always try the parts in reverse... I doubt it would work though...)

-Jonathan, Phil, Cameron

Homemade Rock Climbing Holds Part 3- Casting Resin Holds

Starting supplies for casting a hold

We're so close! 

It's time to begin the final stages of creating a homemade climbing hold. In the photo above, you can see the supplies you'll need (minus the sand). You can find the fiberglass resin at any hardware store. It is a liquid that when mixed with the fixer (included with the resin) hardens. It is typically used in boat or car body repair in layers on top of fiberglass sheets. The can above cost us 36 dollars and cast about 30 holds. Of course your mileage will differ based on the size of your holds.

Next to the resin we have acrylic paint. This is one method of adding color to the holds. Another way is by using dyed sand.

Adding about a teaspoon of acrylic paint will give you some pretty good color. We have found that different colors have different drying times. So when using mixed colors- better just leave it to set for extra long to be safe.
 

For a more vibrant color, you can use dyed sand. This is usually finer and we like the finish of these holds better. It is more costly. A bag of colored sand (found at a hobby store) will be about 5 bucks for a pound. The other fine silica sand we have used on the majority of our holds was 6 bucks for 80 pounds. We have not been able to find white fine grade silica sand locally. This is used in pool filtration systems and may be the best option.

We have also had success adding glitter to make "fancy" holds. Pretty!


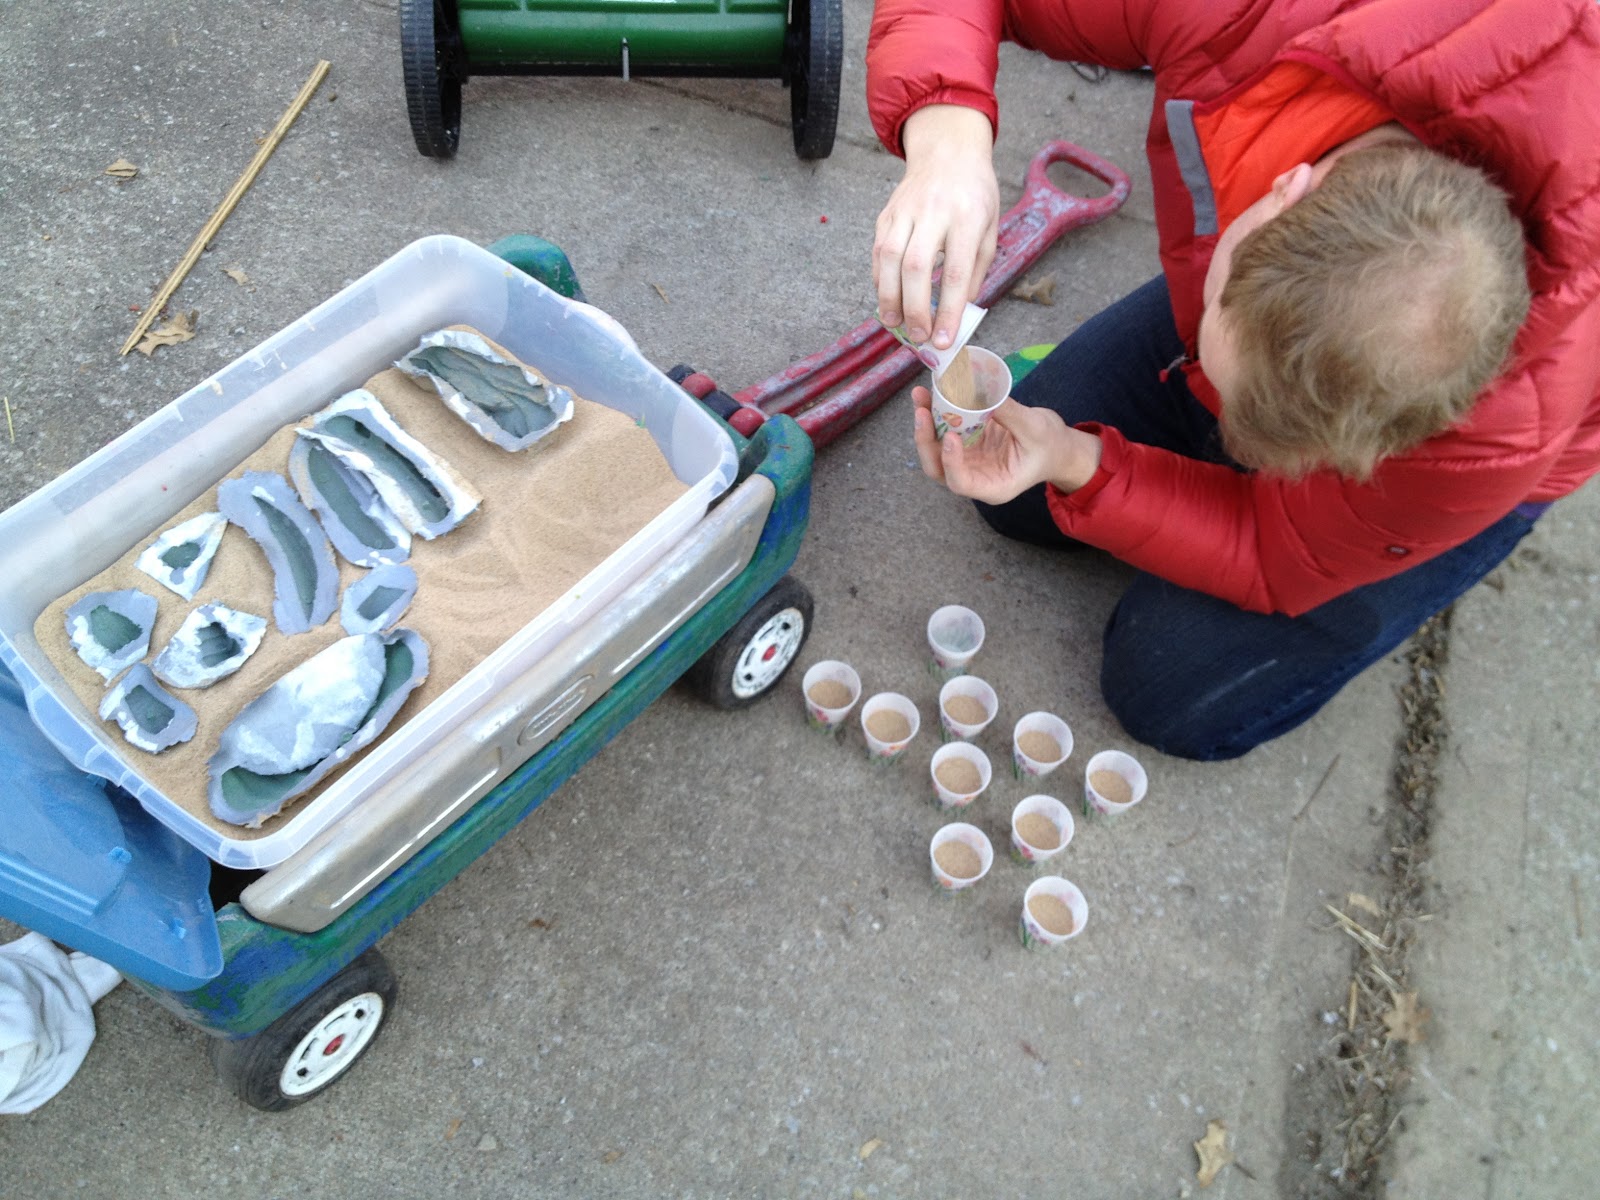
Which ever sand you are using get about 2.5oz in a 5oz Dixie cup. You can measure how much sand a hold will need by filling the mold with sand and then pouring it into the cups. If you follow this method you will end up with a little too much (because of the added volume of resin). You can sort of cheat the amount down maybe 20%. None of this is an exact science, so don't sweat over the measurements. We typically have extra small foot holds that we use any left over mixture in so we don't waste it. Hopefully our pictures will help.


Now you can add the resin into the cup. We try to add 50:50 sand and resin. We use the artwork on the cups as measurements to stay consistent from cup to cup. 

Note: the sand is actually not giving the hold its texture. It is merely a filler for the resin.This saves on the cost of resin and can give color if dyed.